|
Making handlebar muffs
Written November 18, 2005
by Ian Johnston
Click on images for a larger picture.
This winter, I decided I wanted to try a different method to keep
my hands warm on the motorcycle. I had tried various winter gloves,
but none of them really worked, eventually letting through enough cold
air that my fingertips would go numb. On the K75, I'd had heated
grips, which sounds nice until you actually experience the palm of your
hand burning while the back of your hand is numb with cold. Electric
gloves would be great, but are Yet Another Wire to deal with, and more
draw from the unknown-quality electrical system on my Kawasaki Z750s.
So, I decided to try Hippo
Hands, after a suggestion from a Ninja 250 board member.
Unfortunately, the folks at hippohands.com didn't have a model that
would work with barend mirrors. I was on my own.
The concept
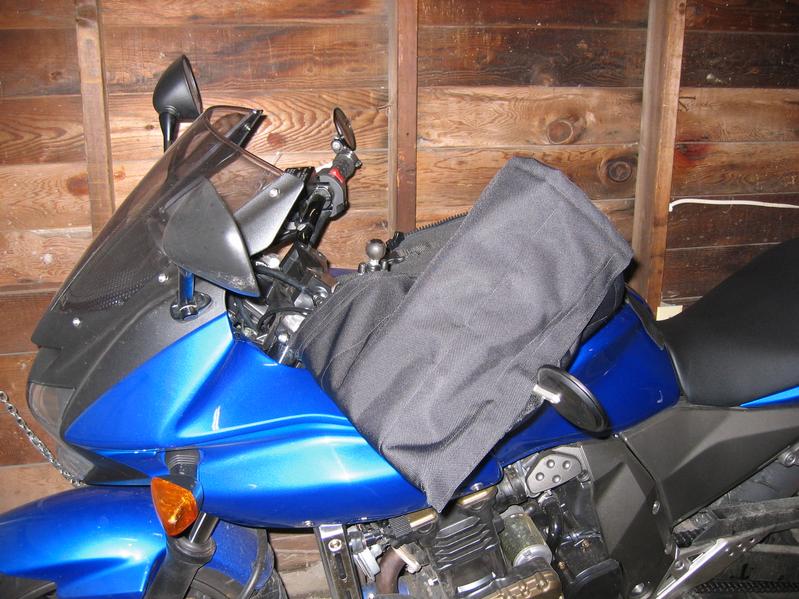
In concept, a set of handlebar muffs, like Hippo Hands, are quite
simple. They're a set of bags, more or less, which fit over the handlebars.
They are windproof and insulated, so that wind, rain or snow which
would normally hit your hands and chill them is directed around.
There's room enough inside the bag to allow you unimpeded access
to the controls.
To accomplish this, commercial muffs are made of heavy nylon or
leather, and lined with synthetic fleece or fur. Although the leather
and fur model sounds better, it's actually far worse if any water, such
as rain or snow, is involved. Nylon and fleece are the choice for
Pacific Northwest weather.
Making them
One of my goals was that the muffs should be multipurpose, fitting
both on the Z750s and the Honda Goldwing, which is a sidecar tug, and
increasingly modified so you wouldn't recognize it as a Goldwing. Both
bikes have barend mirrors, so flexibility for barends was a must.
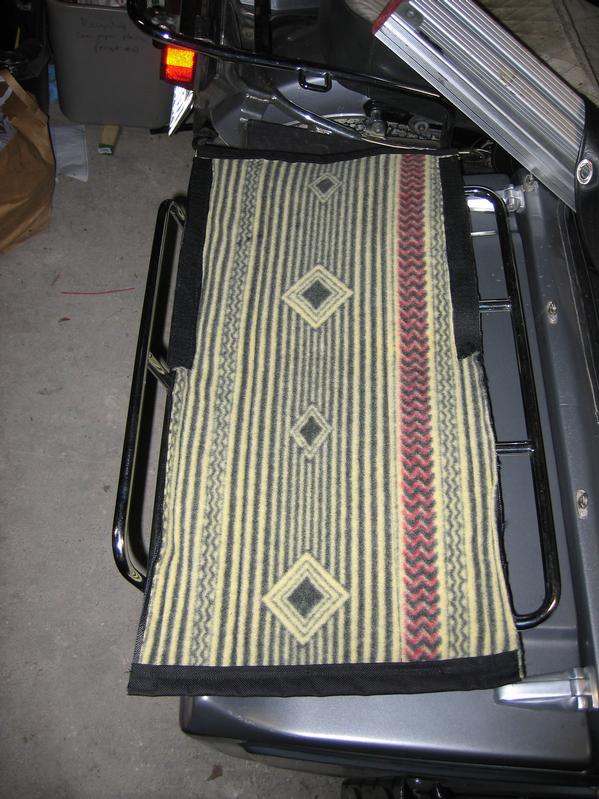
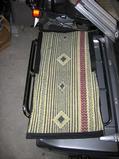
I decided to make my muffs out of nylon and polyester fleece. I
went to Seattle Fabrics
and traded $25 for a yard each of black ballistic nylon (the same heavy
material found reinforcing textile riding gear, $15.50 per yard)
and middleweight fleece, which was on sale at about half price ($8
per yard) for the patterned prints. Upon reflection, a yard was
far too much fabric -- I only used a quarter yard of each. Both were
60" wide.
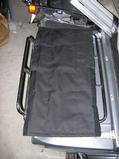 I started with some newspaper, and tried laying out the paper in a
pattern I thought I'd like. The more I played with it, the more I
realized I didn't need to do any fancy shapes -- a simple square of
fabric (when folded over) would be about right. I measured about the
length I'd want on the handlebar sides, and approximately the distance
I'd want from the front of the control lever to over my hand. It ended
up being 11" wide and 14" long (one side). If I were to do it again, I
would go for more like 15 or 16" long front to back.
I started with some newspaper, and tried laying out the paper in a
pattern I thought I'd like. The more I played with it, the more I
realized I didn't need to do any fancy shapes -- a simple square of
fabric (when folded over) would be about right. I measured about the
length I'd want on the handlebar sides, and approximately the distance
I'd want from the front of the control lever to over my hand. It ended
up being 11" wide and 14" long (one side). If I were to do it again, I
would go for more like 15 or 16" long front to back.
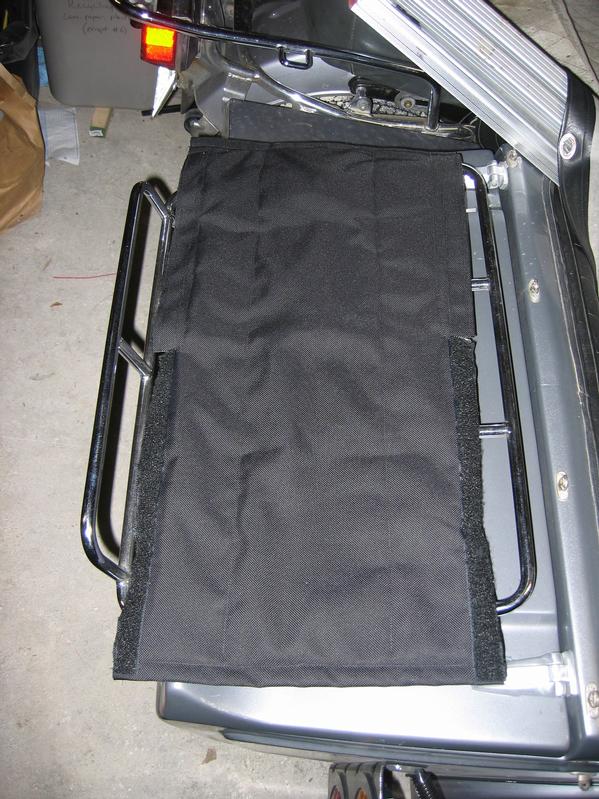
 To hold it all together, yet still make it multi-purpose and
useable in different configurations, I decided to simply run a strip of
velcro up each side. The top-side velcro went on the inside of the
muff (with the insulation), while the bottom-side velcro went on the
outside. This would allow the fabric to overlap such that rain hitting
the top would drip off rather than soaking into the insulation.
To hold it all together, yet still make it multi-purpose and
useable in different configurations, I decided to simply run a strip of
velcro up each side. The top-side velcro went on the inside of the
muff (with the insulation), while the bottom-side velcro went on the
outside. This would allow the fabric to overlap such that rain hitting
the top would drip off rather than soaking into the insulation.
You will need the following materials in addition to normal sewing
supplies:
- Upholstery thread
- Between 1/3 and 1/2 yard of ballistic nylon (or any other
waterproof fabric)
- The same amount of fleece or other insulating fabric
- 2 yards of velcro, 1 to 1.5" wide
Here are the step-by-step instructions to duplicate what I did. I
used heavy black upholstery thread, although regular thread would
probably be just fine. I used a straight stitch with about 12
stitches per inch. "Top" and "bottom" refer to the edges of the muff
which will eventually face backwards. The "sides" are the edges which
will eventually face sideways on the bike. These instructions assume a
basic knowledge of sewing, but you don't need to be a master with a
sewing machine to make these things. Many people know how to sew,
try asking around if you need help.
- Cut the nylon to 32" long and 14" wide -- the fabric likes to bend
along one axis and not the other; make sure it bends easily across the
long dimension, so it'll fold once into a square easily. The extra
inches are for seam allowances.
- Fold over the top and bottom edges and sew them down, to prevent
fraying. Width of the fold over isn't terribly important, but try for
about half an inch.
- Fold over the side edges 1/2" and sew them down. The width from
side to side should now be 13".
- Measure the length from top to bottom and side to side, and cut
out the fleece to those dimensions, but minus 2" from top to bottom.
You can also just lay the fleece down on the nylon and cut it using
that as a guide.
- Line up the fleece on the wrong side of the nylon (the wrong side will
be shiny and plastic-looking), with the top edge about an inch below
the top edge of the nylon. Fold over the top edge of the nylon, so it
sandwiches the fleece. Pin it, and sew it all together along the top
edge, near the top of the nylon (now folded down) so there's not too
much loose nylon flapping around.
- Do the same thing with the bottom edge, adjusting the length of
the fleece if necessary. Make sure the fleece is aligned properly
before stitching it down.
- Once the fleece is secured to the nylon, give it a couple of
stitches down its length, just to keep the fleece and nylon from
separating. I picked roughly the 1/3 and 2/3 width points and sewed
from top to bottom.
- Fold the whole assembly in half, so it forms approximately a
square, with the nylon on the outside. Cut a notch at the fold (ie, at
the halfway point between the top and bottom edges), which is as deep
as your velcro is wide. This will create the two flaps on which the
velcro rides.
- Open the muff again, and trim your velcro width from each side of
the fleece (not the nylon). This gives the velcro a place to attach,
and prevents the fleece from getting soaked in the rain.
- Cut two velcro strips to fit this space on the upper side. Sew
each one down. I chose to put the "hook" (or hard) side of the
velcro on the upper half, although it makes little difference.
- Sew each velcro strip into place. Be aware that velcro against
nylon will be pretty squirrely to sew, so keep close track of the
velcro so it doesn't end up sewed on all cock-eyed.
- Flip the muff over, so you're looking at the nylon side. Cut
complementary velcro strips to fit down the lower half sides. These
should stretch from the notch at the midpoint down to the bottom edge.
Make sure they're the opposite to whatever you put on the top half (on
mine, they're the loop/soft side of the velcro).
- Sew each strip of velcro in place.
- You're done
Stiffening them
Unfortunately, as I found in early testing, the muffs by themselves
make excellent sails. Without some form of stiffening, they will press
into your handlebars, potentially cutting off access to the clutch and
brakes! This happened to me. At one point, with a stiff headwind, I
simply couldn't coax the bike to go any faster. I realized later that
potentially both my front brake and clutch levers were being actuated
by the muffs, doubly preventing me from gaining any speed. Bad, bad
bad! I also would not have been able to reach the front brake lever if
I'd needed to.
 So, I came up with a simple scheme to stiffen the muffs. This part
of the project is highly dependent upon your particular handlebar
setup, so all I can do is show you what I did. You will need to
exercise your own ingenuity to get it to work on your bike.
So, I came up with a simple scheme to stiffen the muffs. This part
of the project is highly dependent upon your particular handlebar
setup, so all I can do is show you what I did. You will need to
exercise your own ingenuity to get it to work on your bike.
 I decided to use lightweight aluminum flat stock as a stiffener. I
picked up a couple of pieces of 1/16" by 1/2" by 3 foot flat stock at
the local giant box home store. I would make something like a
motocross-style brush guard.
I decided to use lightweight aluminum flat stock as a stiffener. I
picked up a couple of pieces of 1/16" by 1/2" by 3 foot flat stock at
the local giant box home store. I would make something like a
motocross-style brush guard.
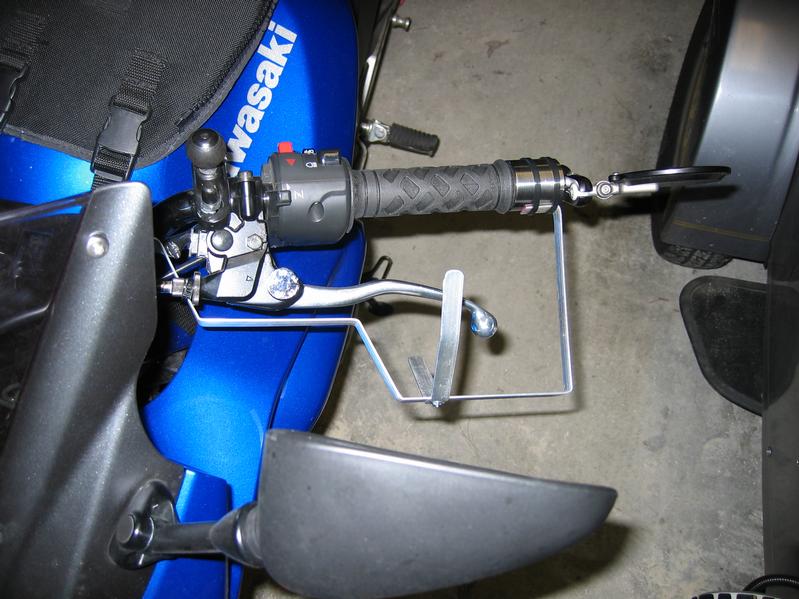
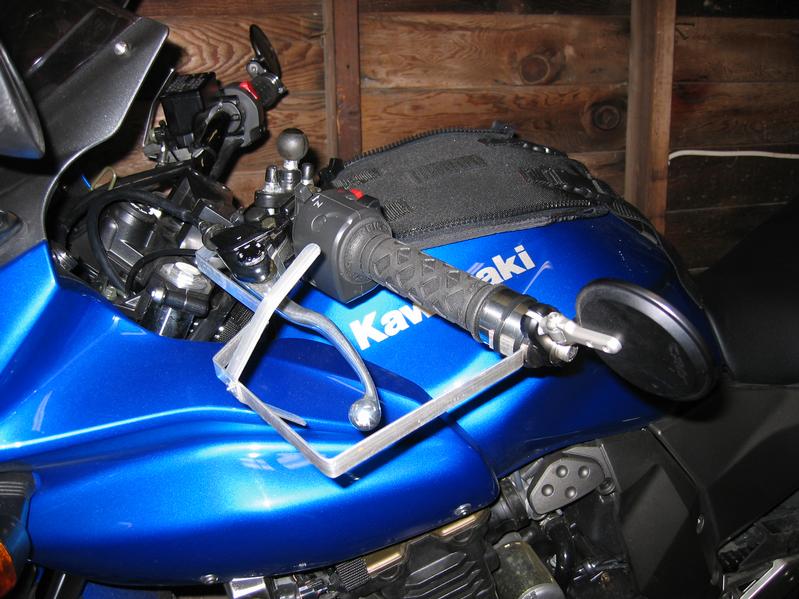
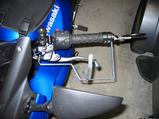
I "prototyped" the guard with some random wire I had lying around.
It ended up being this interesting stepped shape to clear my hand as I
grabbed for the lever, yet still also allow full-lock steering
clearance with the fairing. It attached at the bar-end weight and
halfway down the bend in the handlebar. Both sides were the same basic
shape.
 Finally, I added a single rib at 90° to the spine of the guard,
which was bent back to provide a relatively aerodynamic shape while
still holding the muff open enough to let my hand move freely to the
lever. The rib was attached with a single 4-40 screw and nut. The top
of the rib was about twice as long as the bottom, since that's where
most of the room is needed.
Finally, I added a single rib at 90° to the spine of the guard,
which was bent back to provide a relatively aerodynamic shape while
still holding the muff open enough to let my hand move freely to the
lever. The rib was attached with a single 4-40 screw and nut. The top
of the rib was about twice as long as the bottom, since that's where
most of the room is needed.
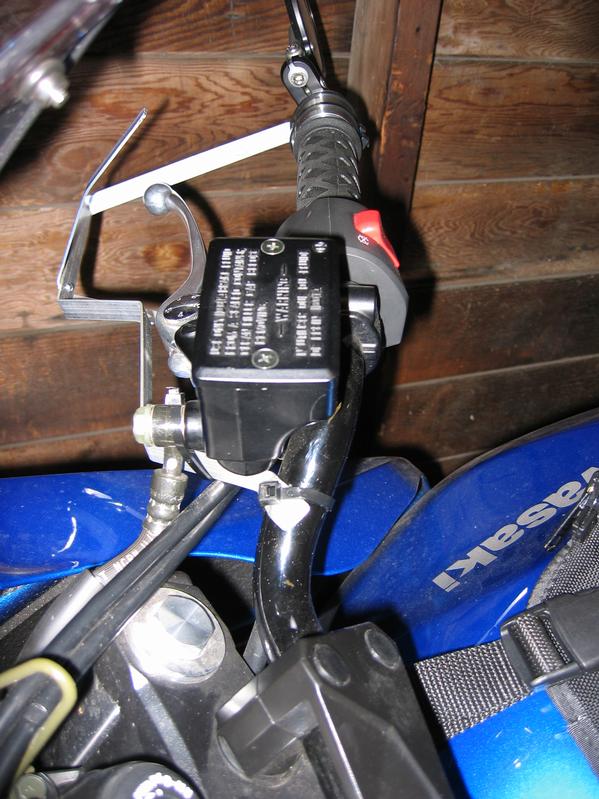
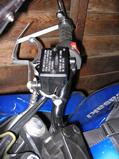
Once the spine was on and shaped properly, it needed to be held up
to keep from simply rotating down on the bar, putting me right back
where I'd started, unable to reach the lever. I ended up ziptying the
spine up to the controls on each side, which is just enough to keep
them from rotating very much. It's not a perfect arrangement, but it
seems to work.
The whole guard is currently held on with zipties, although
eventually I'd like to find or make velcro straps to do the job.
Ideally, I'd fabricate clamps to go between handlebars and guards,
although I doubt I'll go to the trouble.
Copyright 2005 by Ian Johnston. Questions? Please mail me at reaper at
obairlann dot net.
|